
Blur or hide part of the picture
You will hide a face, a number plate, a screen or a logo by blurring or pixelating just that area, while the rest of the picture stays sharp.
The idea: an adjustment clip on the track above your clip carries the effect (a blur or a mosaic), and a mask limits the effect to the area you want to hide.
| Before | After |
|---|---|
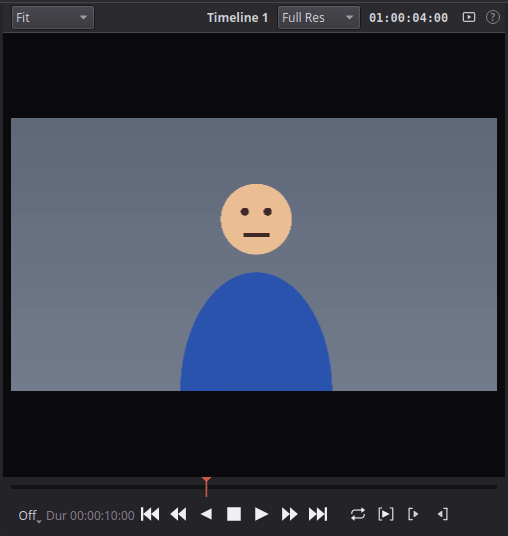 |
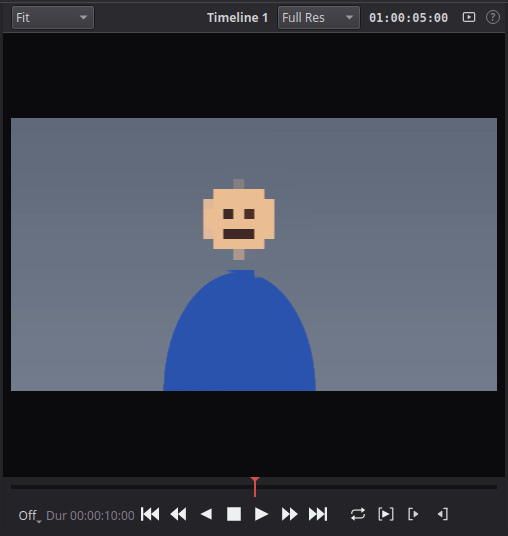 |
1. Add an adjustment clip over the clip
- Click Effects at the top left and open Toolbox > Effects.
-
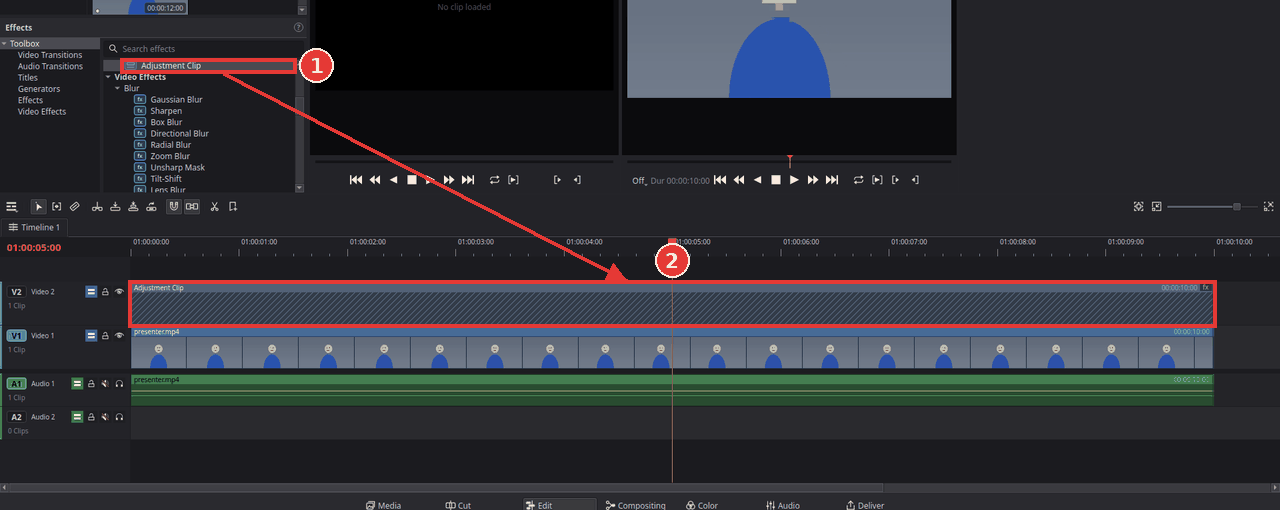
Drag Adjustment Clip (1) onto the empty video track above your clip (V2), at the time where the area must be hidden (2).
-
Drag the edges of the adjustment clip so it starts and ends where the area must be hidden (for example the whole length of the clip below).
An adjustment clip has no picture of its own: its effects act on everything on the tracks below it.
2. Add the blur
-
In the effects library, open Video Effects > Stylize and drag Mosaic onto the adjustment clip. (For a soft blur instead, use Video Effects > Blur > Gaussian Blur.)
-
The whole picture is now pixelated. Click the adjustment clip, open the Effects tab of the Inspector and make the blocks bigger with Block Size (or raise Radius for the Gaussian Blur) until the face can no longer be recognised.
3. Limit it to one area with a mask
- With the adjustment clip selected, open the Video tab of the Inspector.
-
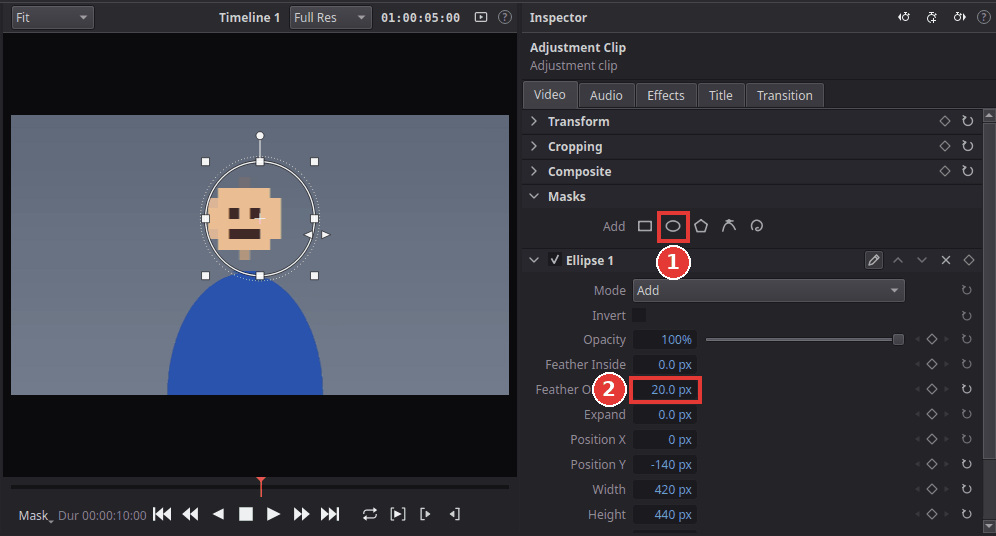
Under Masks, click the ellipse button (1) (or choose Clip > Add Mask > Ellipse Mask). An ellipse appears in the viewer, and the effect now shows only inside it.
-
In the viewer, drag inside the ellipse to move it over the face, and drag the small squares on its edge to change its size.
-
For a soft edge, raise Feather Outside (2) a little, for example to 20 px.
- Play the clip (Space) to check that the area stays hidden in every frame.
If the area moves
Kinoklip cannot follow a moving object by itself yet (no tracking). For an object that moves, animate the mask: move the playhead to the start, click the diamond in the title of the mask's section in the Inspector to add a keyframe, then go forward a little (for example half a second), move the ellipse onto the object again, and repeat. Kinoklip moves the mask smoothly between those keyframes. See Animate with keyframes.
If the area hardly moves, simply make the ellipse a little bigger so it covers the whole path.
Tips
-
Black bar instead of a blur: use a Rectangle Mask with a Solid Color clip from Toolbox > Generators instead of the adjustment clip.
-
Several areas: add one mask per area to the same adjustment clip.
-
Hide everything except one area: tick Invert in the mask's settings; then the blur is outside the ellipse.
-
On-screen controls gone? Click the button at the bottom left of the viewer and choose On-Screen Mask Controls, or click the pencil button in the mask's section of the Inspector.
If something goes wrong
-
Nothing is blurred. The adjustment clip must be on a track above the clip and at the same time on the timeline, and the effect must be on the adjustment clip (check its Effects tab).
-
The whole picture is blurred. The adjustment clip has no mask yet, or the mask is switched off: check the tick box in the title of the mask's section.
Found a mistake? Edit this article on GitHub.