
Remove a green screen
You will make the green background of a clip transparent, so the person in front of it appears over another picture. The same steps work for a blue screen. This is called keying: the green colour is the "key" that is cut out.
| Before | After |
|---|---|
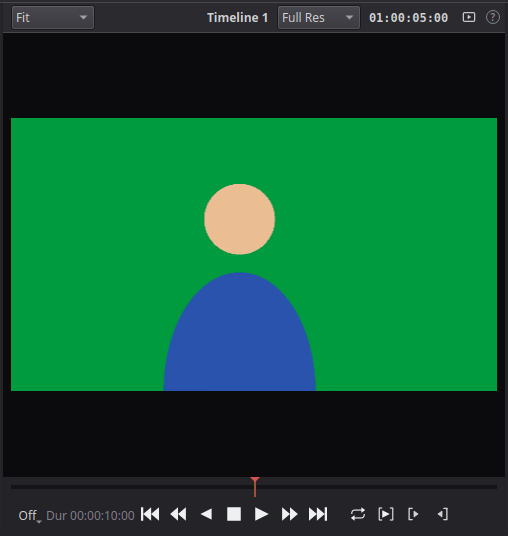 |
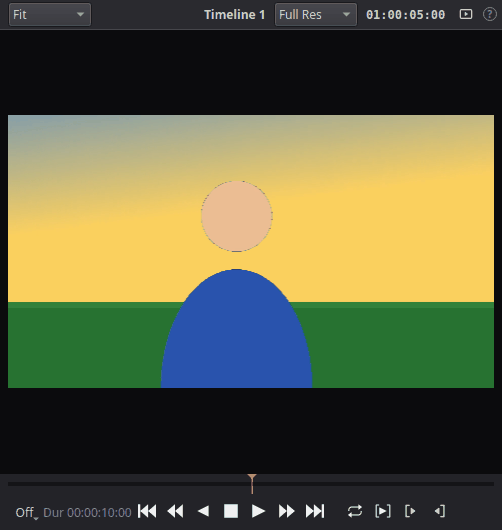 |
What you need
- A clip filmed in front of a green (or blue) screen.
- A background: another video or a picture. Put the background on track V1 and the green screen clip on V2, right above it. The key makes holes in the upper clip, and the lower one shows through.
Steps
- Click Effects at the top left (1) to open the effects library.
-
In the list, open Video Effects > Key and find Chroma Key (2). You can also type "chroma" in the search field.
-
Drag Chroma Key onto the green screen clip on the timeline (3).
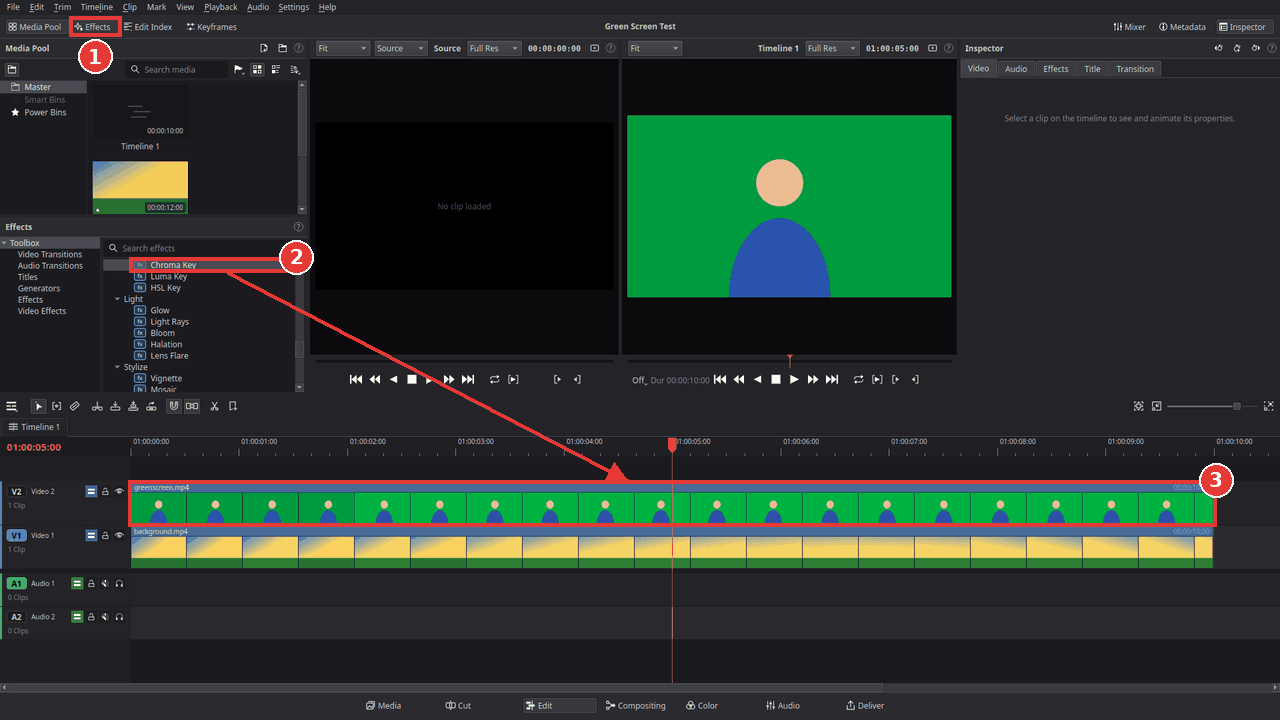
The green should mostly disappear right away: Screen is set to Green Screen. For a blue screen, choose Blue Screen there.
-
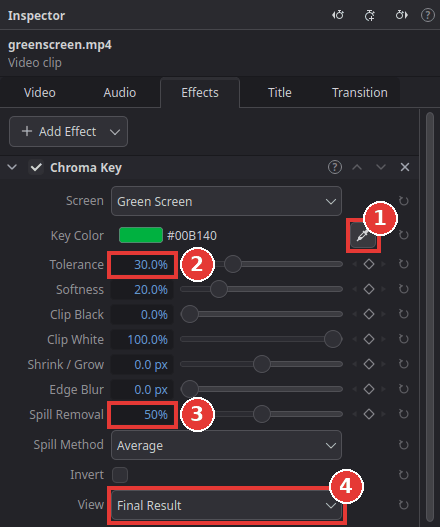
Click the clip to select it. In the Inspector on the right, open the Effects tab. You see the settings of the Chroma Key.
-
Click the eyedropper next to Key Color (1), then click on the green background in the viewer. Kinoklip now removes exactly the green of your clip. Tip: drag a small rectangle instead of clicking, to use the average colour of an area. Press Esc to cancel.
-
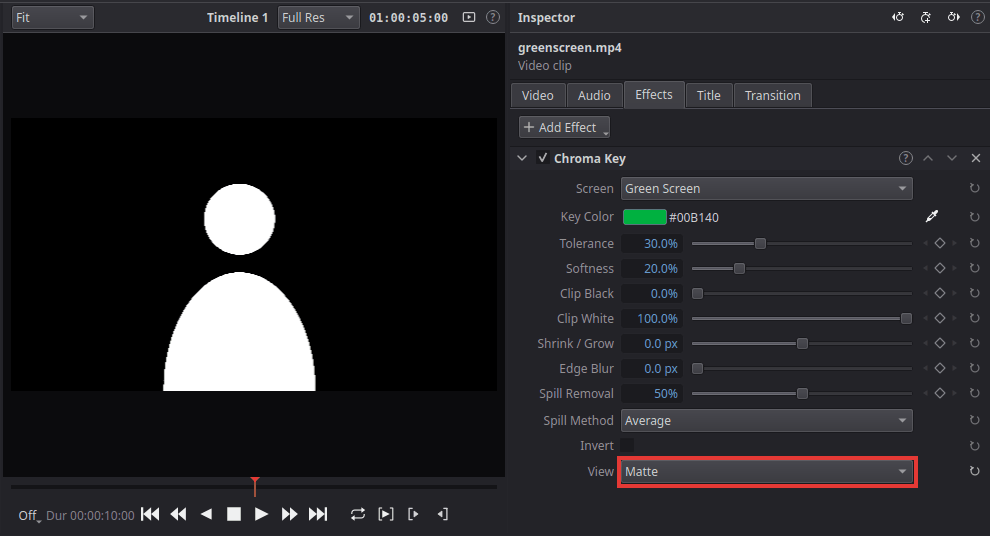
Set View (4) to Matte. The viewer now shows what stays (white) and what becomes transparent (black).
-
Adjust until the background is fully black and the person fully white:
-
Tolerance (2): raise it if green is left over, lower it if parts of the person disappear.
-
Softness: makes the edge between the two softer.
- Clip Black and Clip White: turn nearly black areas fully black and nearly white areas fully white. Useful for grey specks in the background or small holes in the person.
-
-
Set View back to Final Result.
-
If the edges of the person still look green, raise Spill Removal (3). It takes the green glow away that the screen reflects onto hair and skin.
-
Play the clip (Space) to check that the key holds in every frame.
Tips
-
Light the screen evenly. A screen without shadows and wrinkles keys much more cleanly than any setting can fix later.
-
Rough edges: Shrink / Grow makes the kept area a little smaller (negative values) or bigger; Edge Blur softens the edge. Small values (1 to 2 px) are usually enough.
-
Parts of the room are in the picture (lights, the edge of the screen): draw a mask around the person with Clip > Add Mask (for example Rectangle Mask). Everything outside the mask is removed, keyed or not. This is often called a "garbage matte".
-
Status view: set View to Status. It shows solid areas in white, transparent areas in black and half-transparent areas in grey, which makes small holes easy to find.
-
Everything inside one clip: on the Compositing page a Chroma Key node, a Background node and a Merge do the same as the two tracks here, inside the green screen clip itself. Useful when you want to add text or more layers to the keyed shot as well.
-
Other keys: in the same Key folder, Luma Key removes dark or bright areas (for example a black background), and HSL Key removes a range of hue, saturation and brightness.
If something goes wrong
-
The background turns black instead of showing the other clip. The background clip must be on a track below the keyed clip (for example V1 under V2), at the same time on the timeline.
-
The eyedropper does nothing. Move the playhead over the keyed clip first: the eyedropper only works while the viewer shows that clip.
-
Parts of the person disappear too (for example a green shirt). Lower Tolerance, pick the colour again with the eyedropper, or wear a different colour next time.
Found a mistake? Edit this article on GitHub.